Here, we have exclusively brought forward this guide to help users, especially newbies and students, who have Zero idea about how to Set up Free RDP be it for remote learning or for sharing or transferring files from a remote desktop.
But first, let’s give a brief introduction about what RDP actually is and how it benefits various users before we move on to clearly understand the step by step procedure to set up Free RDP.
What is Remote Desktop Protocol (RDP)?
In a very simple language, RDP, also known as Remote Desktop Protocol, is a secure network communication protocol that allows a user (may be a student or an IT professional) with a device (lets just say a mobile handset) to connect with another device (a computer or a server) which happens to be located remotely.
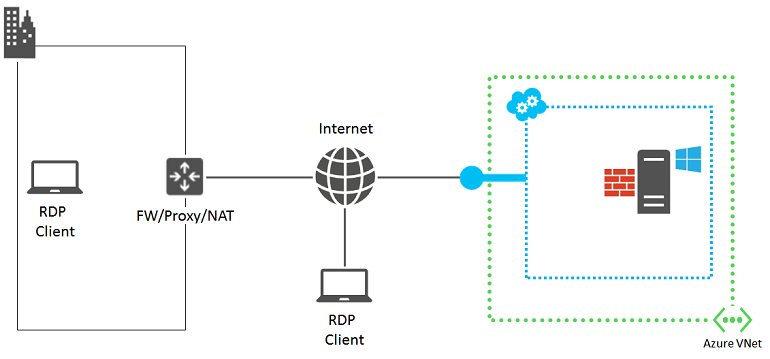
RDP is nothing but another name of Remote connection where a user (a student for instance) who is not present at home where the printer is installed to the PC. So, in such a case, the student can Set up Free RDP on his device and can connect securely with a remote system to accomplish his task.
Benefits of Using RDP for Remote Access
As you can clearly see with the help of the above example how Free RDP services make remote tasks a piece of cake. Below, we have listed more benefits that a user can reap on setting up a Free RDP server:
- Remote Learning and File Sharing– For those students who are involved in distance education, attending remote lectures sharing important documents becomes an everyday activity. To this students can use RDP to make the things easy going.
- Troubleshooting tech-related issues– IT Professionals and Tech support players who work as a freelancer can use a Free RDP for remotely accessing clients’ systems in order to resolve technical issues in their computer.
- Remote Gaming– Students, in their free time, often play multiplayer games. And what if they are hanging out and crave a want to play Multiplayer games installed in their home PC using their hand-set, they can use Free RDP service to enjoy games remotely.
- Multiple OS options– RDP service Providers offer multiple Operating Systems to work with giving an easy user-interface experience and even let the user make configuration as per the requirement.
Prerequisites for Setting Up Free RDP
Users excited to use RDP should know what things are required before we move on with the steps to set up RDP on various devices. The prerequisites for setting up Free RDP are as follows:
Hardware Requirements
As far as Hardware is concerned, Free hardware requires the basic features that are unlimited Bandwidth, efficient CPU processor, sufficient RAM & NVMe Storage, and remote BackUp.
Software Requirements
For software, make sure the RDP server provider offers multiple OS options (Windows/ Linux/ CentOS/ Ubuntu) and an engaging Graphical user Interface to make the navigation easy.
Internet Connection Considerations
A perfect RDP ensures proper remote connectivity with zero chances for Downtime ensuring quick data transfer and remote desktop sharing without any sort of technical glitches.
Setting Up Free RDP services on various Devices
Now, to the best part, How to set Up Free RDP on various Devices, is being discussed in the article further. So, first, let’s go through Step by Step Guide on setting free RDP On Windows and then other devices as well:
On Windows
Setting up a Free Remote Desktop Protocol (RDP) server on a Windows machine involves enabling the RDP feature and configuring the necessary settings to allow remote access.
Here’s a step-by-step guide on how to setup a remote desktop connection:
- Firstly, Enable Remote Desktop >> Open Settings (Windows Key + I) >> Go to system.
- Click on the Remote Desktop Button >> Tap the switch to “On” under the Enable Remote Desktop Tab.
- Click “Confirm” when prompted.
- Now, Go to the Control Panel >> System and Security >> Open Windows Defender Firewall.
- Find “Remote Desktop” in the list and ensure both “Private” and “Public” are checked >> Click “OK” to save the changes.
- Go to settings >> Tap Remote Desktop >> Click on Select Users >> Add the users who should have remote access by clicking “Add” and entering their usernames.
- Click “OK” to save the changes.
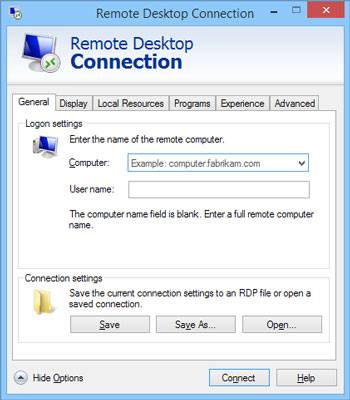
- Enter the IPv4 address of the RDP server >> Enter the username and password of the user account >> Click “OK” to connect to the remote desktop.
On MacOS
Remote Desktop Protocol (RDP) server on macOS can be achieved using a third-party application, as macOS does not support RDP servers.
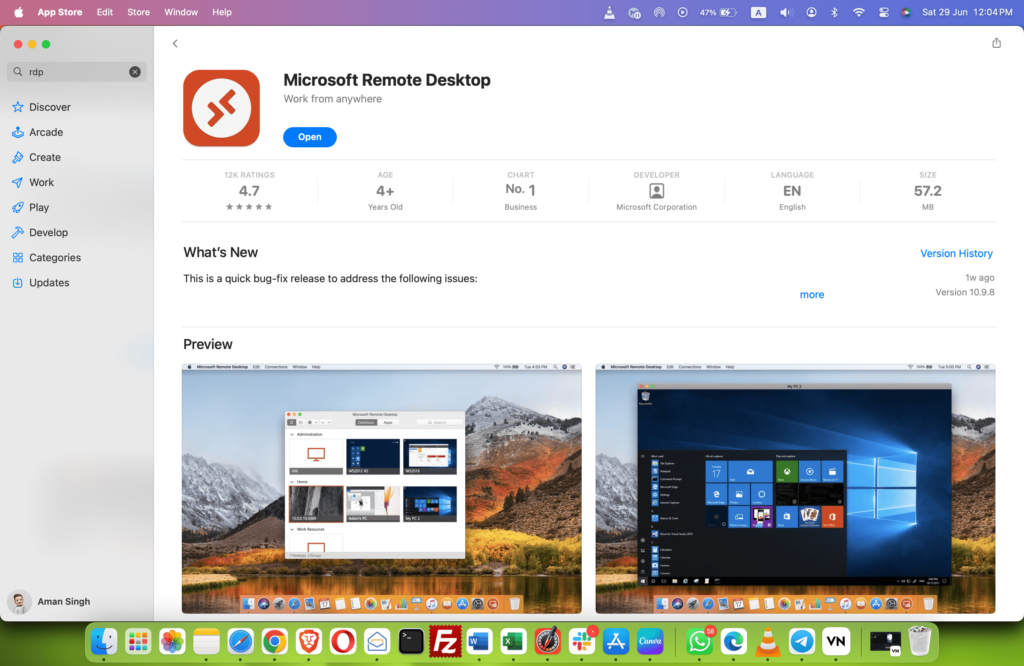
Here, is the guide on how to set up RDP on mac:
- Go to a third party website or search for it online >> Download the application.
- Open the downloaded file >> Follow the on-screen instructions >> Install the application on your Mac.
- Launch the application from your Applications folder >> In the main window, you’ll see options to configure the server.
- Set the “Port” to 5900 >> Click on “Set Password” and enter a strong password.
- Click on the Apple menu and select the System Preferences tab >> Click on Security & Privacy >> Go to the Firewall tab.
- Click on Firewall Options >> Ensure that the server is allowed to accept incoming connections. >> Click OK to save the firewall settings.
- Go to system preference >> Click on the Network tab >> Select the network connection you are using (e.g., Wi-Fi or Ethernet) >> Your IP address will be displayed on the right.
- Launch the RDP server >> enter the IP address >> Click Connect >> You will be prompted to enter the password.
- After entering the password >> Click OK.
- Your Mac’s desktop gets connected remotely.
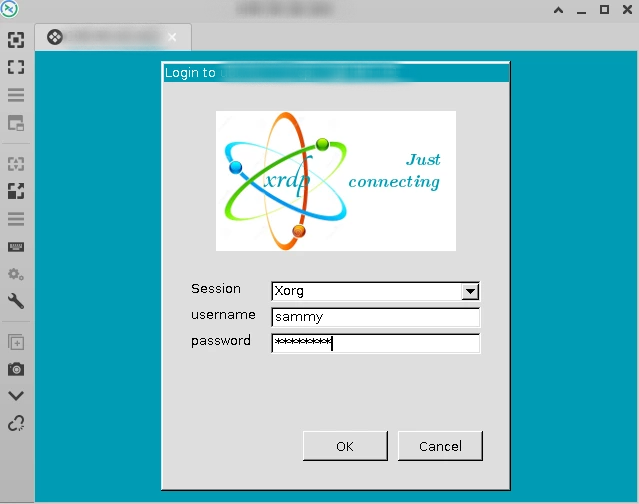
On Linux
Below, we have discussed a very easy step by step procedure on How to setup RDP on Ubuntu Linux OS:
- Log in to your Ubuntu Server >> Open a terminal >> Connect to your server via SSH.
- In the terminal >> Enter the following command to install the Ubuntu desktop environment.
- After installing the desktop environment >> Install XRDP by running (sudo apt install xrdp).
- Enable XRDP to start on boot >> Start the XRDP service by running (sudo systemctl enable xrdp)
- Open Port 3389 on the Firewall.
- On your Windows machine >> Press Win + R on your keyboard >> In the Run dialog >> Type mstsc >> Press Enter to launch the Remote Desktop Connection application.
- In the Remote Desktop Connection window >> Enter your server’s hostname or IP address >> Click Connect.
- When prompted, enter your Ubuntu server’s username (e.g., administrator) and password >> Click “OK” to connect to your Ubuntu server
On Android Devices
If you are looking forward to SetUp RDP on Android Devices and smartPhones, Here is the detailed Stepwise procedure on how to set up RDP on android which is discussed below:
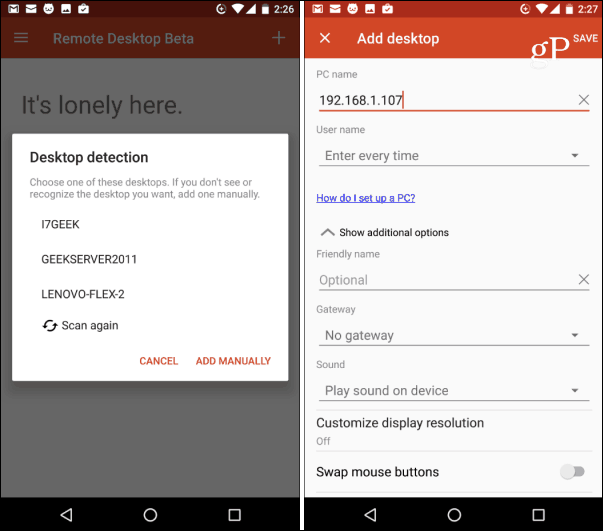
- Open the Google Play Store >> install necessary app (Free RDP server) >> Launch the application on your android device.
- Set a password for security >> Configure the display resolution >> Start the server by turning the Switch to ON
- Copy the IP address displayed on the application >> Tap on the plus icon to add connections.
- Enter the IP address of your Android device >> Leave other settings as default >> Tap connect to continue.
- Now, to connect your PC to control your Android mobile >> Launch RDP application on your PC >>Enter the IP address of your android device.
- You should now be able to control the android device remotely from your PC.
Final Words
Exclusively for our readers, who are eager to use RDP but do not know where to start, we have categorically explained step wise each procedure that you need to perform in order to set up RDP on various devices effortlessly.
RDP happens to be one of the safest remote connection functions that not only is useful for professionals and organizational level work but also for students who can use RDP for remote learning and clipboard sharing.
Users can easily follow the protocols provided in this article to seamlessly connect your device to a Free RDP server in order to facilitate remote connection.